
처음으로 풀어보는 ios 앱 리버싱 문제이다.
mac 환경이 없어서 에뮬레이터조차 돌릴 수 없어 못 풀고 있었는데, 맥북을 얻게 되어 한 번 풀어봤다.
정적 분석 툴은 IDA, 시뮬레이터는 mac book의 xcode 시뮬레이터를 이용했다.
우선 기본 정보를 알기 위해서는 ipa앱을 unzip한 다음 내용을 볼 수 있다고 한다.
이렇게 보면 분석해야 하는 파일은 일단 Info.plist를 슥 본 다음
에뮬로 앱을 돌리면서 코드를 봐야할 것 같다.
1
plutil -convert xml1 Info.plist -o Info_readable.plist
바이너리 파일이라 xml로 바꿔서 보기좋게 보면
1
2
3
4
5
6
7
8
9
10
11
12
13
14
15
16
17
18
19
20
21
22
23
24
25
26
27
28
29
30
31
32
33
34
35
36
37
38
39
40
41
42
43
44
45
46
47
48
49
50
51
52
53
54
55
56
57
58
59
60
61
62
63
64
65
66
67
68
69
70
71
72
73
74
75
76
77
78
79
80
81
82
83
84
85
<?xml version="1.0" encoding="UTF-8"?>
<!DOCTYPE plist PUBLIC "-//Apple//DTD PLIST 1.0//EN"
"http://www.apple.com/DTDs/PropertyList-1.0.dtd">
<plist version="1.0">
<dict>
	<key>BuildMachineOSBuild</key>
	<string>24G419</string>
	<key>CFBundleDevelopmentRegion</key>
	<string>en</string>
	<key>CFBundleExecutable</key>
	<string>MobileBabyAnalysis4</string>
	<key>CFBundleIdentifier</key>
	<string>mobilehacking.kr.MobileBabyAnalysis4</string>
	<key>CFBundleInfoDictionaryVersion</key>
	<string>6.0</string>
	<key>CFBundleName</key>
	<string>MobileBabyAnalysis4</string>
	<key>CFBundlePackageType</key>
	<string>APPL</string>
	<key>CFBundleShortVersionString</key>
	<string>1.0</string>
	<key>CFBundleSupportedPlatforms</key>
	<array>
		<string>iPhoneOS</string>
	</array>
	<key>CFBundleVersion</key>
	<string>1</string>
	<key>DTCompiler</key>
	<string>com.apple.compilers.llvm.clang.1_0</string>
	<key>DTPlatformBuild</key>
	<string>23C53</string>
	<key>DTPlatformName</key>
	<string>iphoneos</string>
	<key>DTPlatformVersion</key>
	<string>26.2</string>
	<key>DTSDKBuild</key>
	<string>23C53</string>
	<key>DTSDKName</key>
	<string>iphoneos26.2</string>
	<key>DTXcode</key>
	<string>2620</string>
	<key>DTXcodeBuild</key>
	<string>17C52</string>
	<key>LSRequiresIPhoneOS</key>
	<true/>
	<key>MinimumOSVersion</key>
	<string>26.2</string>
	<key>UIApplicationSceneManifest</key>
	<dict>
		<key>UIApplicationSupportsMultipleScenes</key>
		<true/>
		<key>UISceneConfigurations</key>
		<dict/>
	</dict>
	<key>UIApplicationSupportsIndirectInputEvents</key>
	<true/>
	<key>UIDeviceFamily</key>
	<array>
		<integer>1</integer>
		<integer>2</integer>
	</array>
	<key>UILaunchScreen</key>
	<dict>
		<key>UILaunchScreen</key>
		<dict/>
	</dict>
	<key>UIRequiredDeviceCapabilities</key>
	<array>
		<string>arm64</string>
	</array>
	<key>UISupportedInterfaceOrientations~ipad</key>
	<array>
		<string>UIInterfaceOrientationPortrait</string>
		<string>UIInterfaceOrientationPortraitUpsideDown</string>
		<string>UIInterfaceOrientationLandscapeLeft</string>
		<string>UIInterfaceOrientationLandscapeRight</string>
	</array>
	<key>UISupportedInterfaceOrientations~iphone</key>
	<array>
		<string>UIInterfaceOrientationPortrait</string>
		<string>UIInterfaceOrientationLandscapeLeft</string>
		<string>UIInterfaceOrientationLandscapeRight</string>
	</array>
</dict>
</plist>
이런 내용들이 담겨있다. 보기에도 그렇고 claude한테 물어봐도 특별한 것 없이 바이너리에 모두 로직이 있다고 한다.
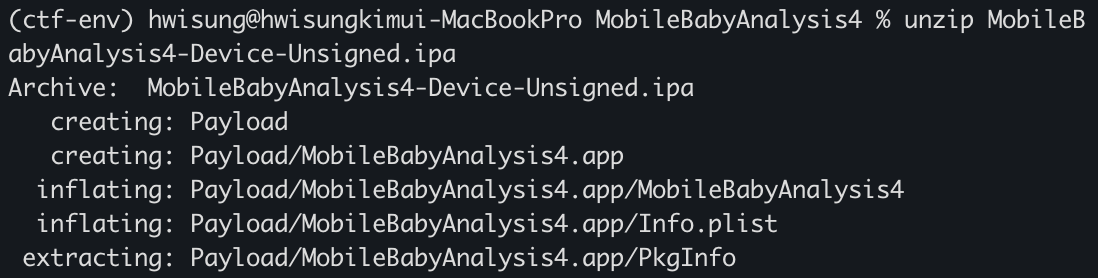
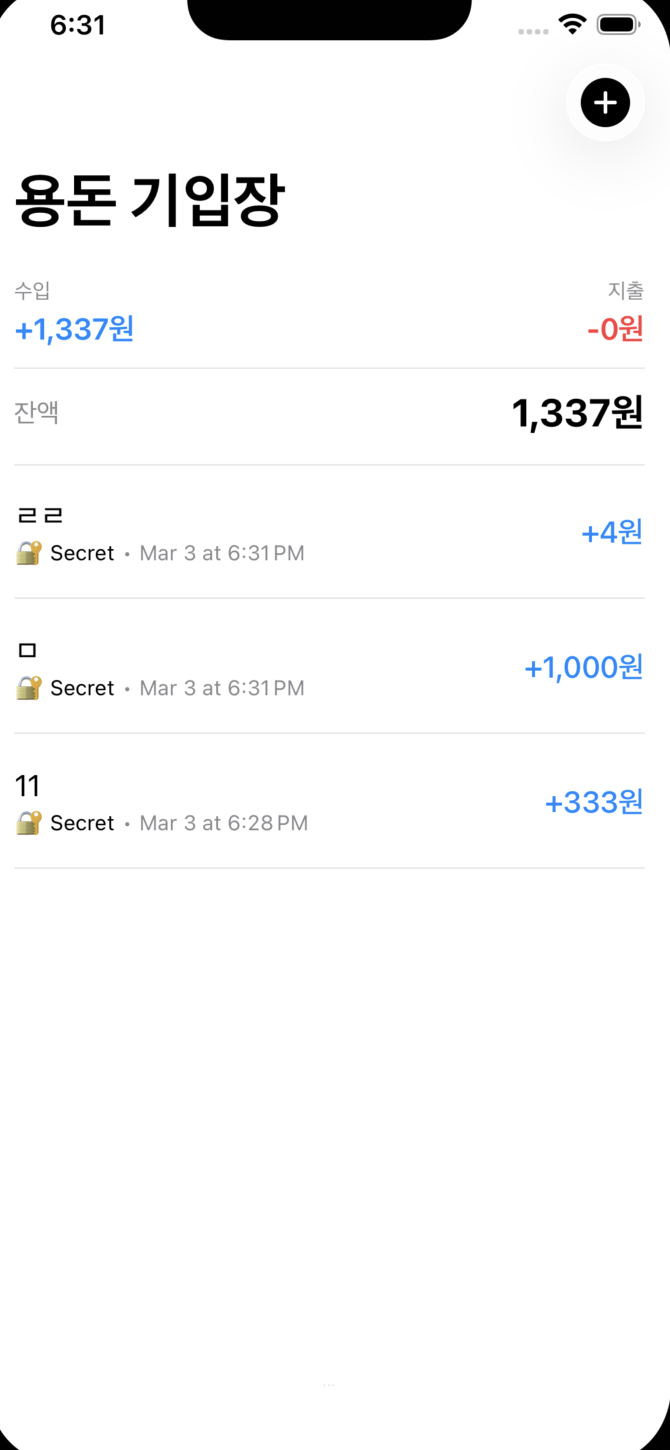
다음으로 앱을 실행해보면
이런 용돈 기입장 페이지가 나오고,
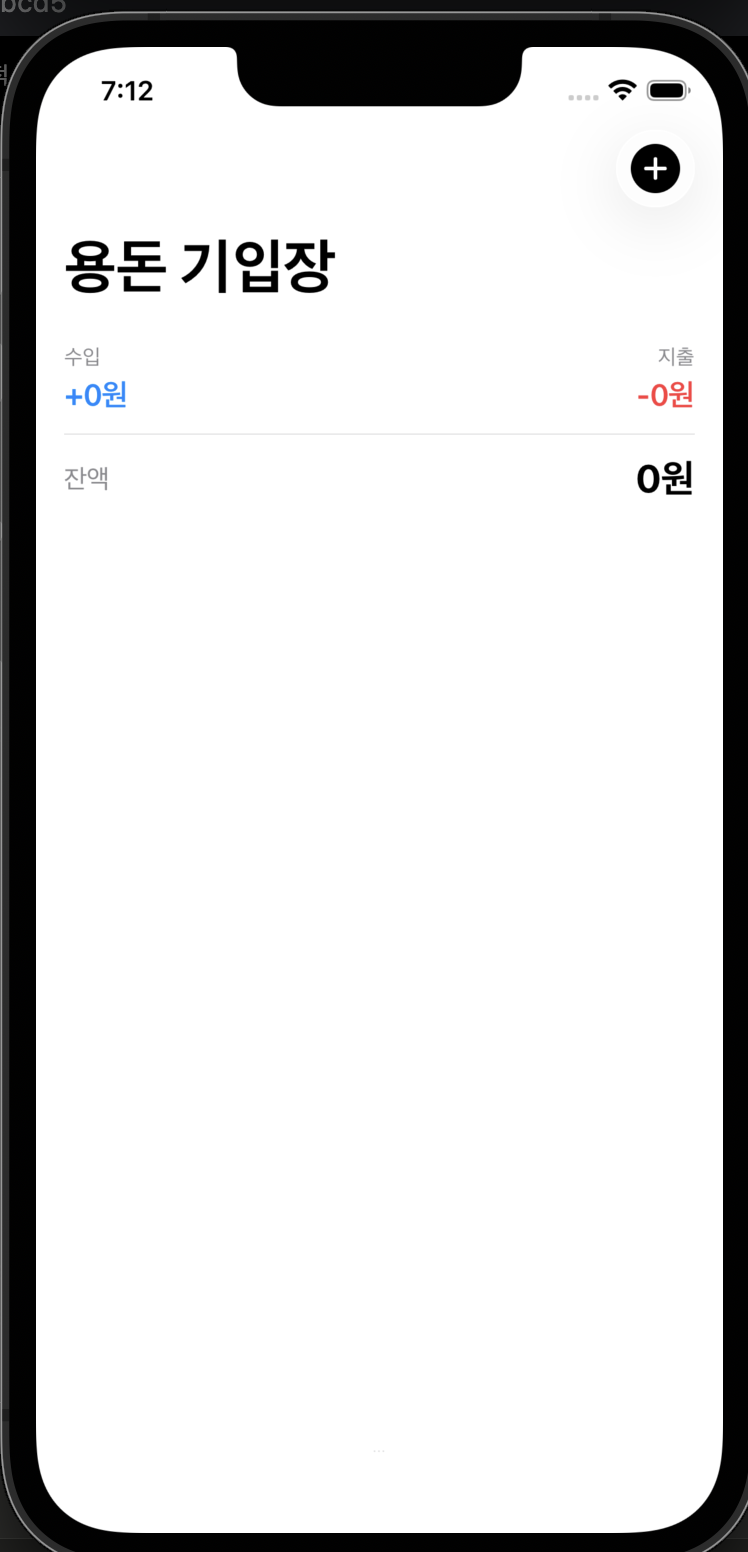
+버튼을 누르면 이렇게 거래 추가 페이지가 나오고, 카테고리와 금액을 적을 후 저장을 할 수 있다.
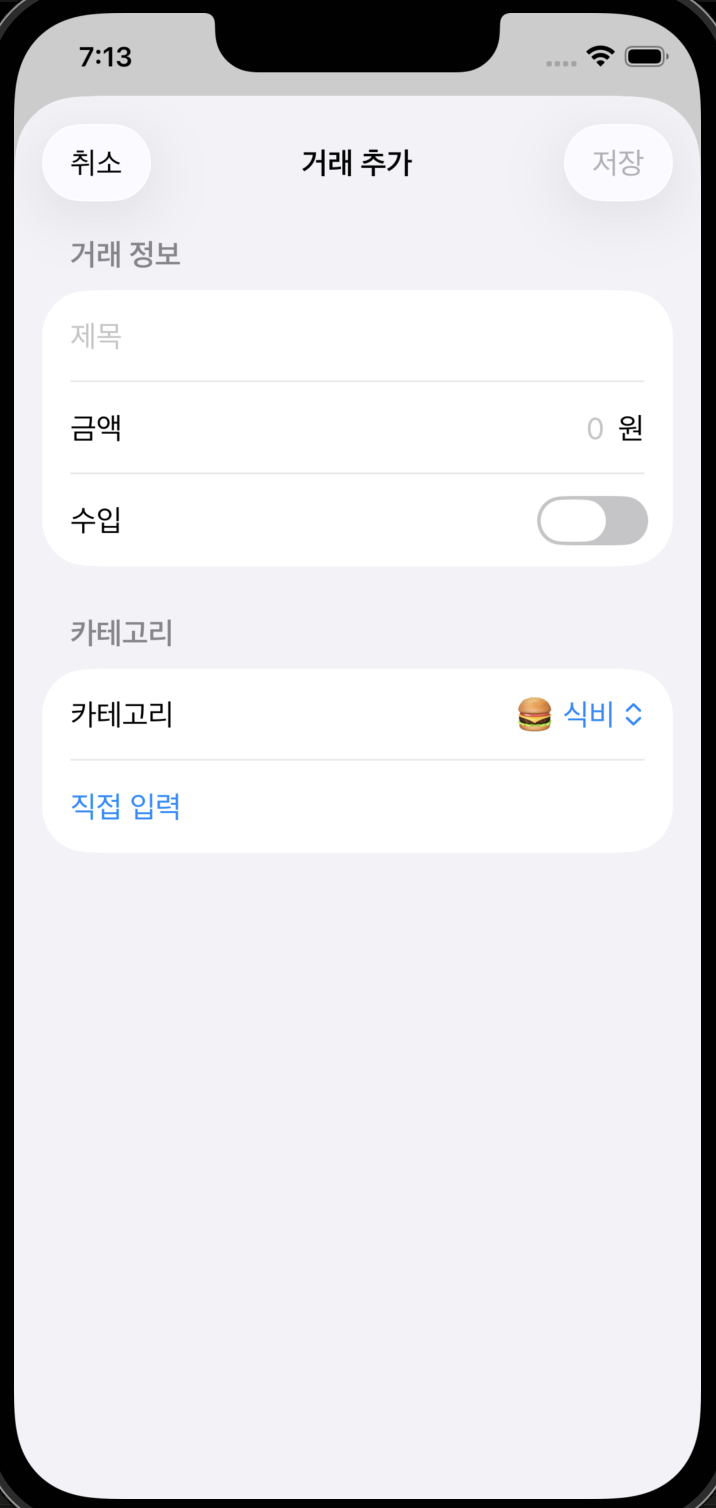
그러면 이렇게 내역이 기록되는 가계부 앱이다.
안드로이드와 다르게 IOS는 따로 함수명의 양식이 어느정도 정해져있거나 하지 않아서
실행해보면서 코드를 찾아나가는 부분이 더 중요한 것 같다.
이제 IDA를 통해서 분석을 해보자.
기본이 swift->C로 변환된 파일이라 보기 많이 불편해서 플러그인들을 찾아다녔지만 좋은걸 찾지는 못했다.
능력이 된다면 좀 사람이 볼만한 플러그인을 만들어보고 싶긴한데 불가능한걸까.
어쨌든 함수를 보면

이렇게 AddTransactionView, MainView, SecretView가 있고, 가장 의심스러운 곳은 SecretView이다.
아무래도 AddTransactionView는 거래를 추가하는 저 화면이고, SecretView가 도달해야하는 위치로 보인다. 그래서 SecretView의 SuccessView.getter() 함수를 보니 ChallengeValidator.generateSecret() 이라는 함수가 있다.
1
v94 = (_QWORD *)Text.init<A>(_:)(v109, &type metadata for String, v29);
이것이 텍스트를 만드는 함수이고,
1
v109[0] = specialized static ChallengeValidator.generateSecret(_:)(*v94);
그 v109는 genarateSecret 함수에서 나온다.
분석을 해보면
1
2
3
4
5
6
7
8
9
10
11
12
13
        v42 = v7;
        KeyPath = swift_getKeyPath(&unk_1000161E8);
        v10 = lazy protocol witness table accessor for type Transaction and conformance Transaction(
                &lazy protocol witness table cache variable for type Transaction and conformance Transaction,
                &protocol conformance descriptor for Transaction);
        ObservationRegistrar.access<A, B>(_:keyPath:)(&v42, KeyPath, v10);
        swift_release(KeyPath);
        v11 = swift_getKeyPath(&unk_1000161E8);
        v12 = lazy protocol witness table accessor for type Transaction and conformance Transaction(
                &lazy protocol witness table cache variable for type Transaction and conformance Transaction,
                &protocol conformance descriptor for Transaction);
        PersistentModel.getValue<A>(forKey:)(&v42, v11, v12, &protocol witness table for String);
        swift_release(v11);
이 부분이 트랜잭션을 받고, getValue가 값을 꺼내는 패턴이라고 한다.
1
2
3
4
if ( v42 == 0x6365532090949FF0LL && v43 == 0xAB00000000746572LL )
        {
          v4 = swift_bridgeObjectRelease(0xAB00000000746572LL);
        }
여기에서 string으로 가져온 값을 비교한다.
위의 값들을 utf-8로 변환해보면 🔐 Secret 라는 값이 나온다.
다음 조건문은
1
2
3
4
5
6
7
8
9
10
11
12
13
14
15
  v15 = (unsigned __int64)&_swiftEmptyArrayStorage;
  if ( ((unsigned __int64)&_swiftEmptyArrayStorage & 0x8000000000000000LL) != 0 )
    goto LABEL_43;
LABEL_25:
  if ( (v15 & 0x4000000000000000LL) == 0 )
  {
    if ( *(_QWORD *)(v15 + 16) == 3 )
    {
      v17 = 3;
      goto LABEL_28;
    }
LABEL_45:
    swift_release(v15);
    return 0;
  }
우선 v15가 어떤 array의 저장소이고 *(_QWORD *)(v15 + 16)가 배열의 count로써 쓰인다고 한다.
즉 필요한 배열의 개수가 3개라는 것을 의미한다고 한다.
마지막 조건문은
1
2
3
4
5
6
7
8
9
10
11
12
13
14
15
16
    v23 = swift_getKeyPath(&unk_100016210);
    v24 = lazy protocol witness table accessor for type Transaction and conformance Transaction(
            &lazy protocol witness table cache variable for type Transaction and conformance Transaction,
            &protocol conformance descriptor for Transaction);
    PersistentModel.getValue<A>(forKey:)(&v42, v23, v24, &protocol witness table for Int);
    swift_release(v23);
    swift_release(v20);
    ++v18;
    v25 = __OFADD__(v19, v42);
    v19 += v42;
    if ( v25 )
      goto LABEL_42;

  swift_release(v15);
  if ( v19 != 1337 )
    return 0;
여기에서는 필터된 트랜잭션에서 int값을 가져오고 그것을 모두 더한 값이 1337이면 secretview가 실행되는 것이다.
1
2
3
4
5
6
7
8
9
10
11
12
13
14
15
16
17
18
19
20
21
22
23
24
v42 = 0x7B67616C66LL;
  v43 = 0xE500000000000000LL;
  v35._countAndFlagsBits = v26;
  v35._object = v28;
  String.append(_:)(v35);
  swift_bridgeObjectRelease(v28);
  v36._countAndFlagsBits = 95;
  v36._object = (void *)0xE100000000000000LL;
  String.append(_:)(v36);
  v37._countAndFlagsBits = v29;
  v37._object = v31;
  String.append(_:)(v37);
  swift_bridgeObjectRelease(v31);
  v38._countAndFlagsBits = 95;
  v38._object = (void *)0xE100000000000000LL;
  String.append(_:)(v38);
  v39._countAndFlagsBits = v32;
  v39._object = v34;
  String.append(_:)(v39);
  swift_bridgeObjectRelease(v34);
  v40._countAndFlagsBits = 125;
  v40._object = (void *)0xE100000000000000LL;
  String.append(_:)(v40);
  return v42;
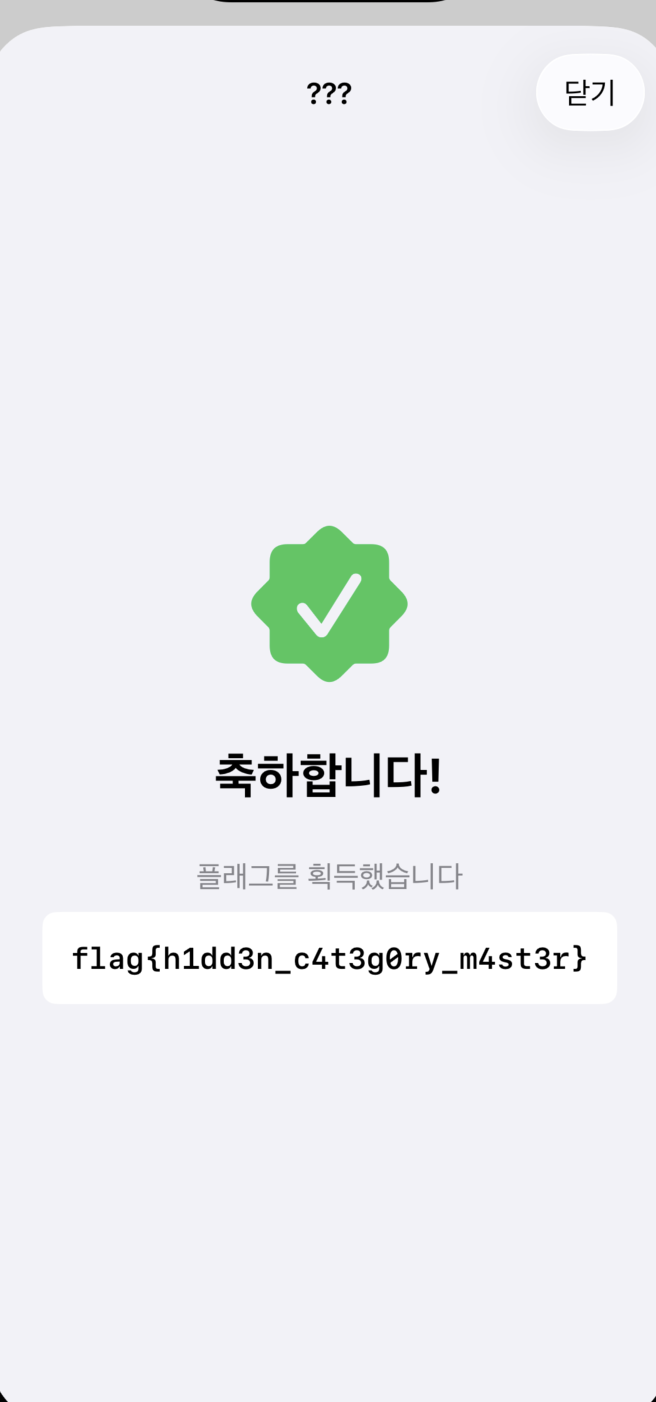
마지막 부분의 v42와 문자열을 만드는 것에서 flag{_ _ } 형식임을 알 수 있다.
이제 화면을 트리거하는 부분을 찾아야 하는데.. 사실 어떻게 찾는지 모르겠다.
클로드의 말에 따르면 함수 이름에서 mainview.handlesecretTap()이 있기에 수상하니까 여기를 분석하면 된다.
1
2
3
4
5
6
7
8
Date.init()(v2);                        // 현재 시간
State.wrappedValue.getter(v4);          // lastTapDate 읽기
v8 = Date.timeIntervalSince(_:)(v4);   // 현재 - 마지막탭 = 경과시간

if ( v8 >= 1.0 )   // 1초 이상 지남
    tapCount = 1;  // 리셋
else
    tapCount += 1; // 누적
이게 timestamp이고
State.wrappedValue.getter(v29);  // tapCount 읽기
if ( v29[0] >= 3LL )             // 3번 이상이면
{
    tapCount = 0;                // 리셋
    checkConditions(transactions) // 데이터 검증
    if ( true )
    {
        showSecret = true;       // SecretView 오픈
        State.wrappedValue.setter(v29, v23);
    }
}
요게 트리거하는 핵심 조건이므로 1초에 3번 이상 바텀 탭을 누르면 flag가 열리게 된다.
조건을 맞추고
코드를 보기가 너무 어렵다.. 리버싱 능력의 한계를 느꼈지만 그래도 어느정도 감은 잡을 수 있었다.